Apps Deployment
AirWatch has 2,5 mechanisms to deploy apps:
- Apps & Books → Internal. You can only deploy 3 versions of an application called “Alpha”, “Beta”, “Production”;
- Devices → **Staging & Provisioning →**Product List View → Add Product. Add Manifest → Install Application. Difference between this method and the one below is not clear, except slightly easier config;
- Devices → Staging & Provisioning → Components → Files/Actions. Add Files/Actions → Add Manifest → Install Unmanaged Application.
I recommend the 3rd method as the most descriptive and stable if several versions of an application are needed in one Organization Group.
Things to check in application deployment
Application ID
Check if there is a modification of the Application ID while uploading the application in the Console via Staging & Provisioning → Components → Applications or check while uploading the Application, is it fetching the Application ID and populating the same name in the Application ID field.
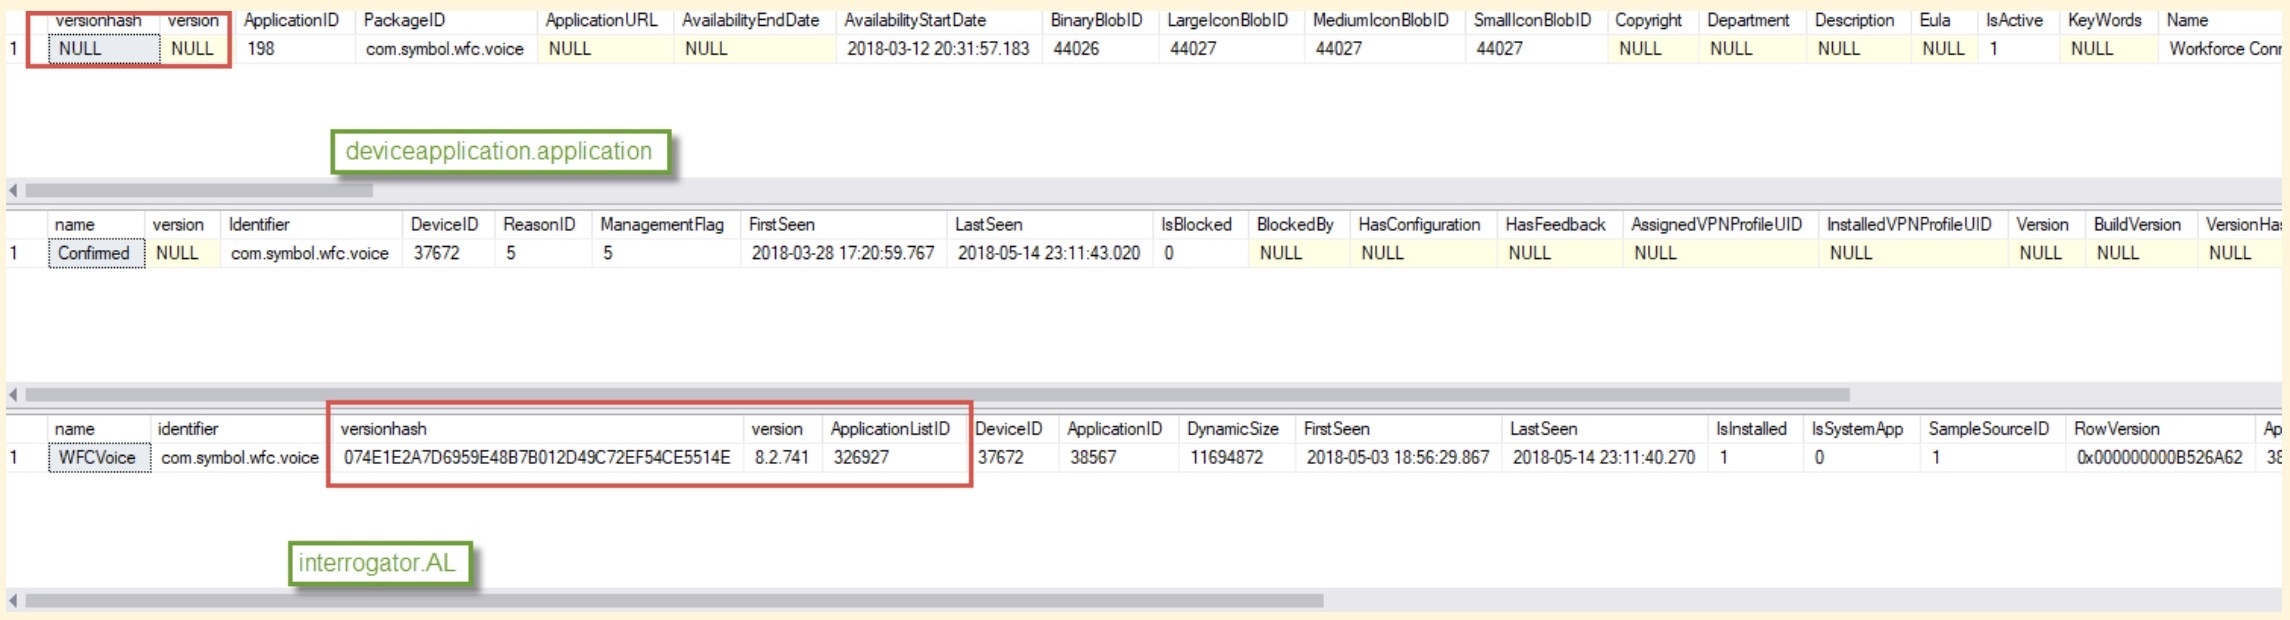
Application Metadata
Once the app gets uploaded, AirWatch SQL writes down its’ metadata to SQL. Parsing the data:
SELECT a.name, a.versionhash, * FROM INTERROGATOR.APPLICATIONLIST AL
JOIN interrogator.Application A ON AL.ApplicationID=A.ApplicationID
WHERE DEVICEID in (1473) and isinstalled=1
See more on SQL querying apps
Warning
On AirWatch 9.2.3 version and lower, metadata provided by some build systems like Gradle 3 is incorrectly processed. Specifically a VersionHash is needed in the correct place for the app to see it.
Application Deployment Logs
- Device receives command to install application
- Device is directed to app destination for download via Manifest.plist file - so search for “manifest” in the logs:
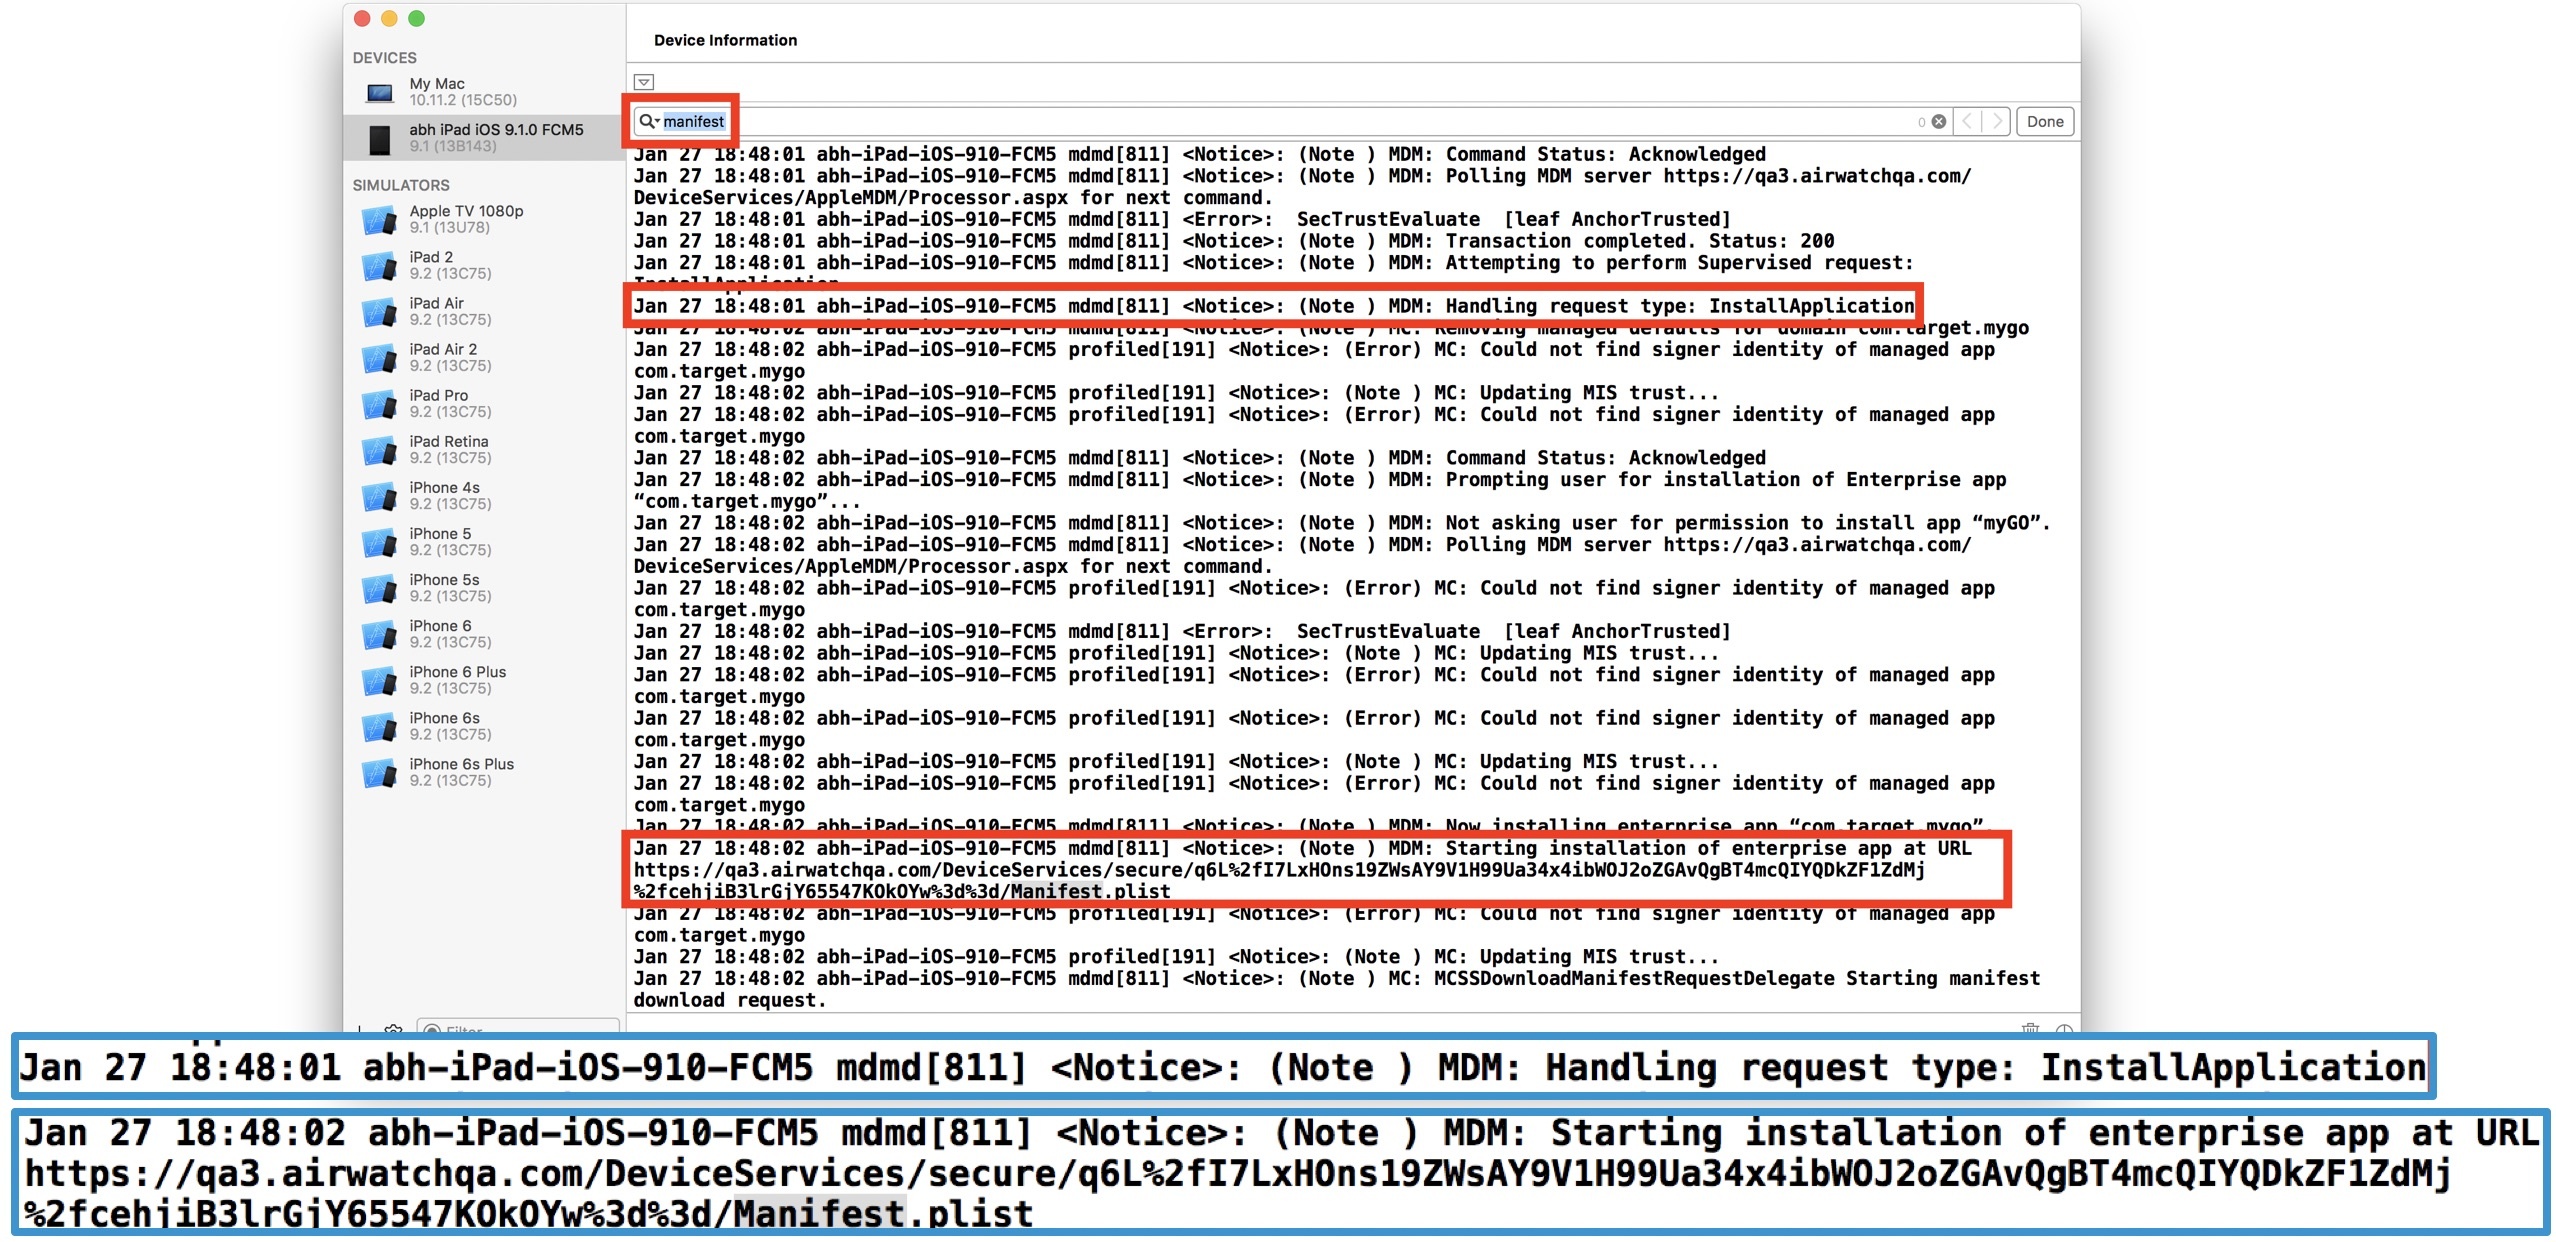
- Device is redirected to Manifest.plist URL
- Device locates Blobhandler.pblob URL:
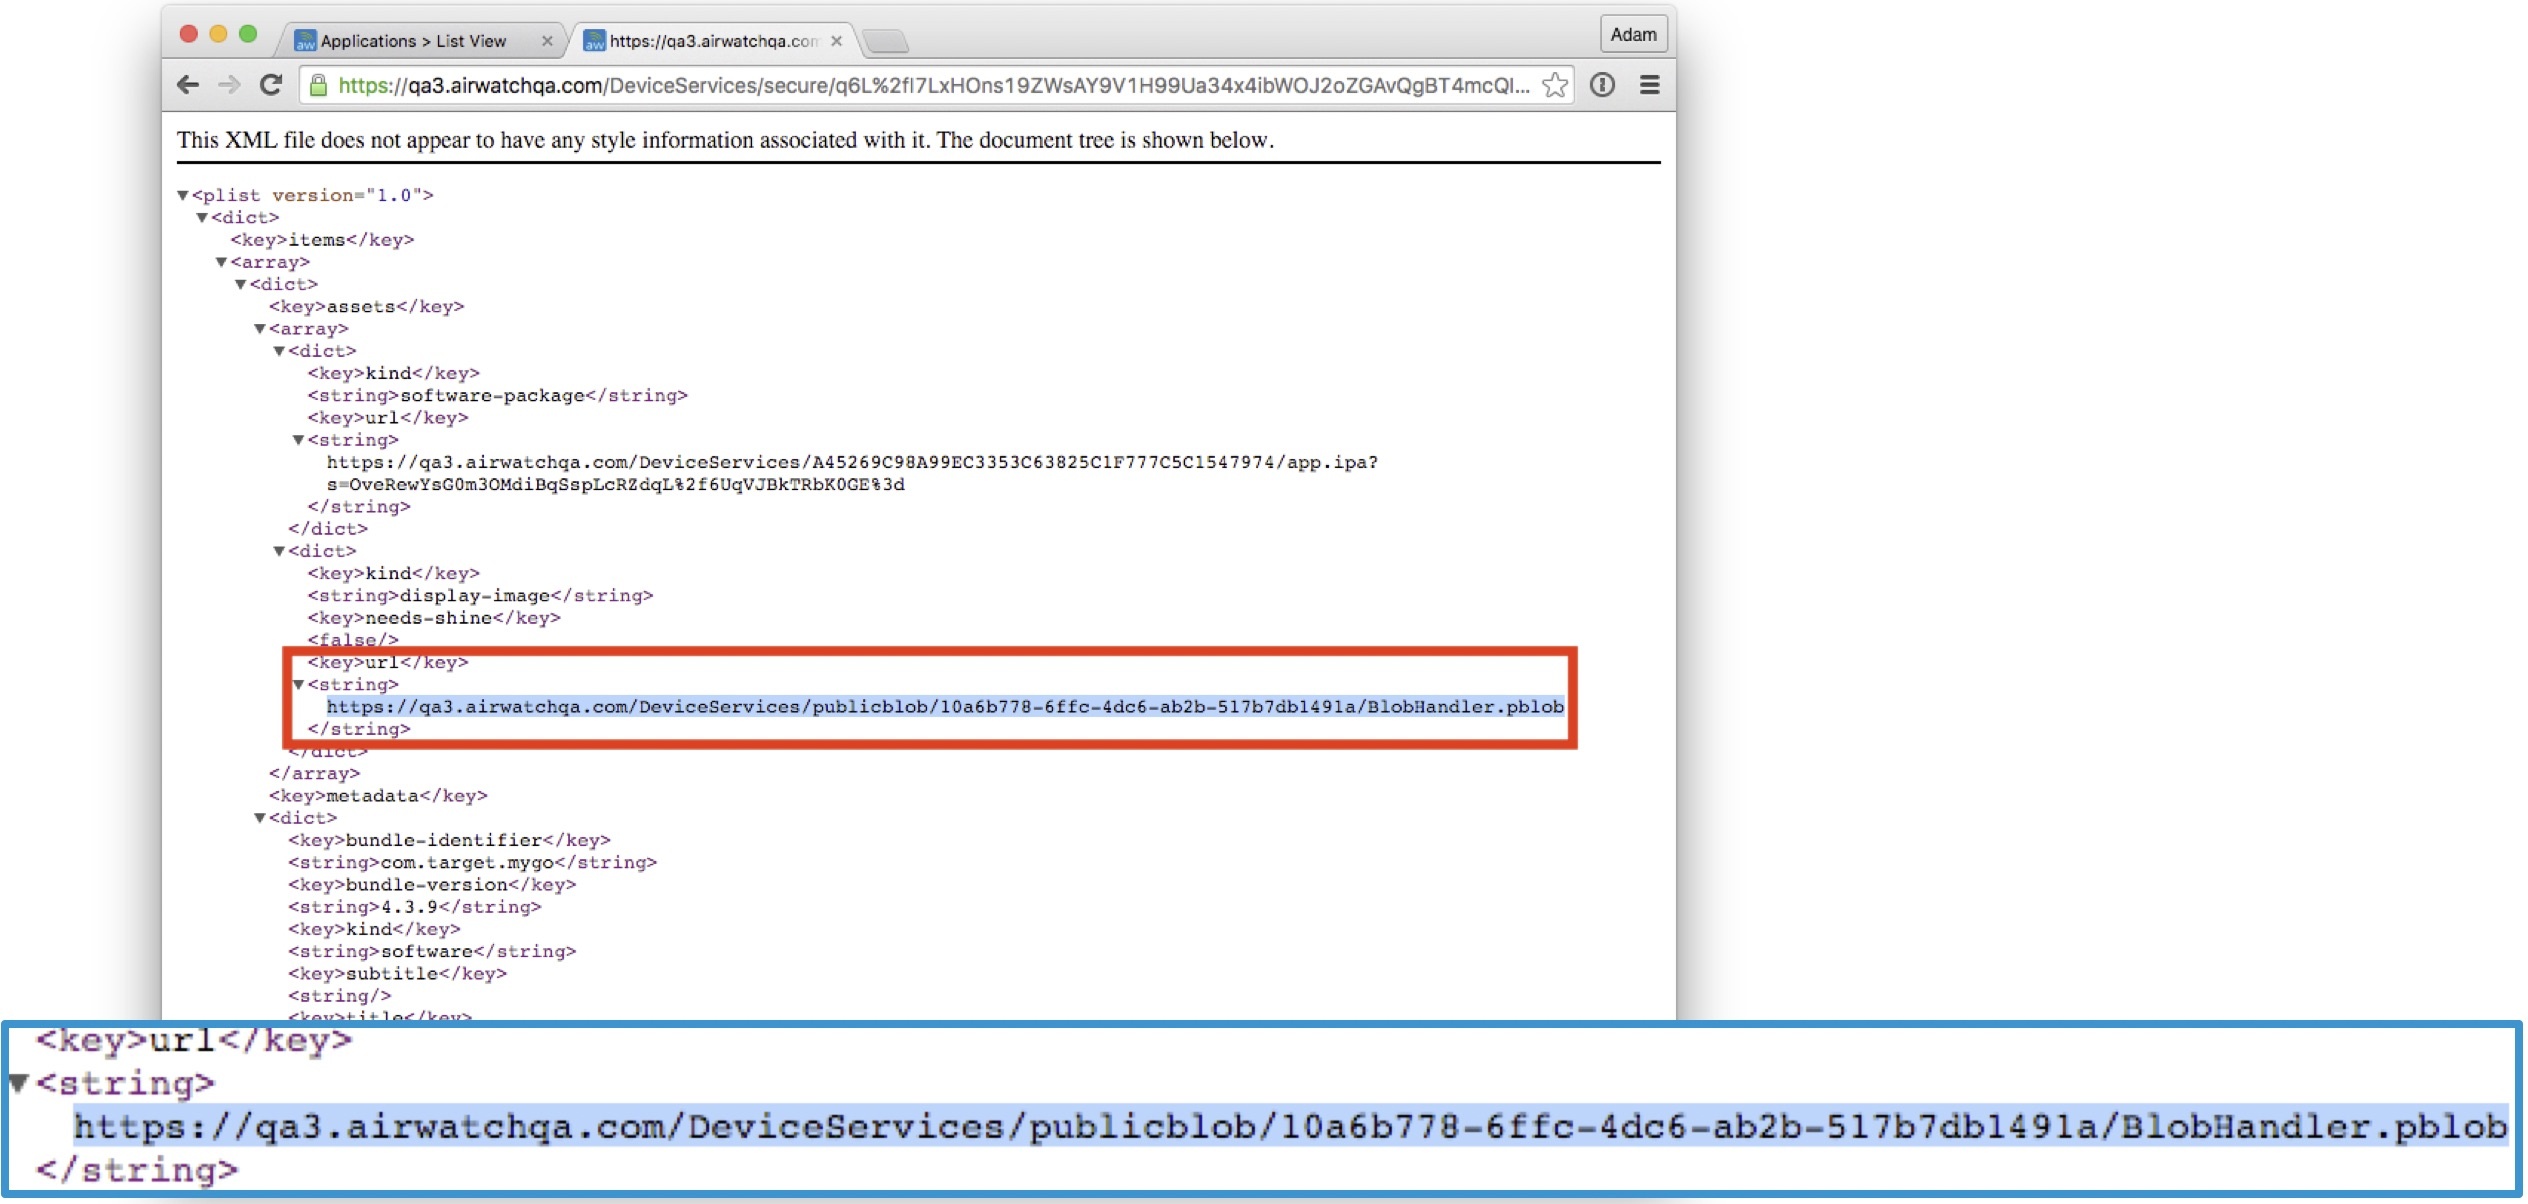
- Device is redirected Blobhandler.pblob URL
- Application download begins
Tip
You can copy the blob link (see picture) manually in the browser to check that download starts.