macOS Apps Deployment
External link:
You are able to deploy apps on Mac OSX devices either from Apps & Books or from Product & Provisioning method. If you have a pkg or dmg file, then you could simply use Apps & Books. However, if you have multiple files to be executed or scripts to run then you could use Product & Provisioning. In AirWatch 9.3+, all macOS application file types (.dmg, .pkg, .mpkg, .app) can be managed through the Internal Applications section. This new framework leverages the popular Mac Admin community tool, Munki.
Provisioning with Munki
Enabling Software Management
- Navigate to Settings > Devices & Users > Apple > Apple macOS > Software Management
- Enable Software Management , there is a check in place to verify if File Storage is enabled at this page. If there is no File Storage, the admin will be requested to enable File Storage.
- On-Prem deployments will need to enable CDN.
Before uploading macOS File to AirWatch
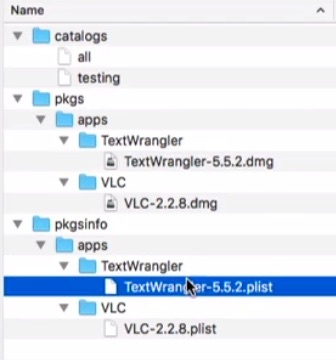
All primary macOS software file types will now be uploaded through Internal Applications (.pkg, .dmg, .mpkg). A .pkg file can be a Bootstrap Package or can be managed through full lifecycle management (this feature). In order to configure Advanced Management options for macOS software and for effective desired state management, which is achieved through the integrated Open-Source Munki library in the AirWatch Agent, a metadata file must be generated for the file separately before uploading it to the AirWatch Console. Munki’s deployment logic is built on the concept of pkginfo files, which are xml/plist files that contain metadata, configuration information, and more for a given application file. AirWatch requires this pkginfo file along with the application file to manage the deployment in the Console.
The pkginfo file is genetrated with VMware AirWatch Admin Assistant (see tools page for download). This is a GUI wrapper for a Munki command-line utility and is used to generate the pkginfo metadata file for a given application file.
-
Download and install the Admin Assistant tool to a macOS device or VM.
-
Open the Assistant. The Assistant dialog will ask for the application installer files to parse.
-
Upload an application installer file by dragging & dropping a .pkg, .dmg, .mpkg, .app file into the labeled field, or browse the local files on the machine in order to find an installer file.
Note
If the file is .app, it will be converted into a .dmg for deployment
-
Once the file is selected and uploaded, the Assistant will automatically start parsing process the process. Additional files can be added during this time if needed.
-
Once the parsing is complete, the tool will prompt to reveal the parsed metadata files in Finder. Store the metadata files in a local folder where they can be easily retrieved during the Software Distribution procedure.
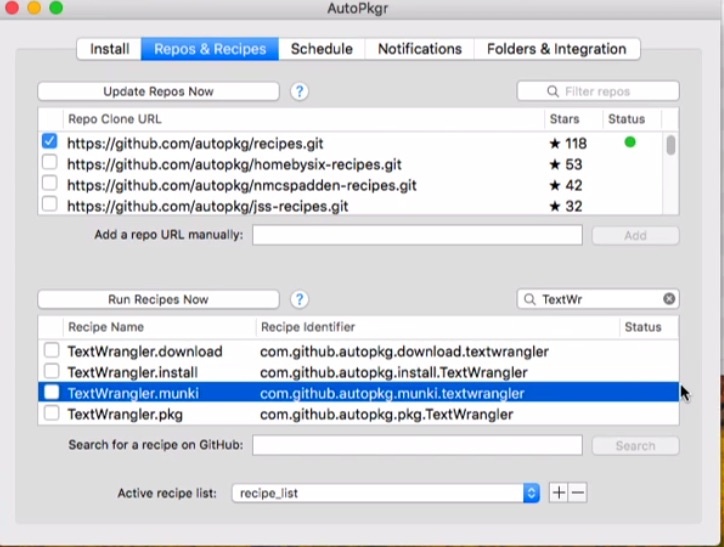
There are multiple ways to obtain the metadata/pkginfo file aside from using the Admin Assistant. One of them is to use Autopkg and its’ GUI tool Autopkgr.
Uploading a macOS Application to the AW Console:
- Navigate to Apps & Books > Applications > Native > Internal
- Click Add Application
- Upload app/software file (.pkg, .mpkg, .dmg)
- Continue to the next screen and Upload the pkginfo .plist file
- Continue to customize the app deployment. The proceeding screens will display any available configurations present in the pkginfo file (for example, a pkginfo from AutoPkg may contain an install_check script). Additional deployment configurations can be defined, and will be merged with the existing configurations
- If the pkginfo file has one or more key and configuration that are not exposed in the UI, they will not be affected. This feature is important as it allows administrators to upload pkginfo files with keys that would be supported by the Munki client but would not be configurable in the UI. Any changes in the UI will be merged with the existing keys.
Pre/Post Install Scripts
A common reason to repackage software is to perform additional configuration tasks or to install additional items. A technique to avoid repackaging is to add pre-install scripts and/or post-install scripts to the configuration of an item. These scripts can take care of some of the tasks which previously may have required repackaging to implement.
An Exit Code of 0 will define the script as successfully executed in order to allow Munki to continue.
Note
Failure of the pre-install script will abort the installation attempt. Failure of the post-install script will log errors, but the installation will be considered complete.
Note
SCRIPT LOG
echo statements will be logged to /Library/Application Support/AirWatch/Data/Munki/Managed Installs/Logs/ManagedSoftwareUpdate.log
Uninstall Methods
There are multiple options available for uninstallation of software. The appropriate option will be selected by default by the VMware Admin Assistant tool based on the software’s file type. If needed options to override the default values are available in the AirWatch Console.
Remove Copied Items
Used primarily for software installed from a .dmg
- Pulls from items_to_copy array[dicts] in the pkginfo file
- All file paths in this array will be deleted
- Future Console release will show the paths in the items_to_copy array in the UI
Remove App
- Pulls from installs array[dicts] in the pkginfo file
- All file paths in this array will be deleted
- Future Console release will show the paths in the installs array in the UI
Remove Packages
Used primarily for software installed from a .pkg
- Uses receipts and analyzes the packages to remove
- Tries to determine what files were installed via the Bom file
- Deletes receipt
- Will only remove if package is not associated with any other files or programs
- Future Console releases will show the receipts that Munki check for in the UI
Uninstall Script
Can be used for any installer type
- Written in shell script
- Used to perform custom uninstall operations if needed
- If the Admin has a customized deployment of an app, they will need to also write a corresponding uninstall script to remove their custom configurations
Install or Uninstall Verification
With some software, the Admin needs to configure what exactly defines a Successful Install or Uninstall. Munki allows this through setting an Install or Uninstall Check Script
Install Check Script - If present, this script is executed to determine if an item needs to be installed. A return code of 0 means install is needed; any other return code causes install to be skipped.
Uninstall Check Script - If present, this script is executed to determine if an item needs to be uninstalled. A return code of 0 means uninstall is needed; any other return code causes uninstall to be skipped.
Conditions
Conditions can defined on a per-application level so that they are evaluated prior to the download and installation of a software.
Warning
Custom conditions will be created in a later version of AirWatch.
Built-in Conditions
Currently available built-in attributes for conditional comparison:
| Attribute | Type | Description | Example Comparison |
| hostname | string | Hostname | hostname == "Lobby iMac" |
| arch | string | Processor architecture. e.g. 'powerpc', 'i386', 'x86_64'. | arch == "x86_64" |
| os_vers | string | Full OS Version e.g. "10.7.2" | os_vers BEGINSWITH "10.7" |
| os_vers_major | integer | Major OS Version e.g. '10' | os_vers_major == 10 |
| os_vers_minor | integer | Minor OS Version e.g. '7' | os_vers_minor == 7 |
| os_vers_patch | integer | Point release version e.g. '2' | os_vers_patch >= 2 |
| machine_model | string | 'Macmini1,1', 'iMac4,1', 'MacBookPro8,2' | machine_model == "iMac4,1" |
| machine_type | string | 'laptop' or 'desktop' | machine_type == "laptop" |
| ipv4_address | array of strings | This contains current IPv4 addresses for all interfaces. | ANY ipv4_address CONTAINS '192.168.161.' |
| munki_version | string | Full version of the installed munkitools | munki_version LIKE '*0.8.3*' |
| serial_number | string | Machine serial number | serial_number == "W9999999U2P" |
| date | UTC date string | Date and time. Note the special syntax required to cast a string into an NSDate object. | date > CAST("2013-01-02T00:00:00Z", "NSDate") |
Example:
machine_type == “laptop” AND os_vers BEGINSWITH “10.7”
date > CAST(“2016-03-02T00:00:00Z”, “NSDate”)
Dates in conditions:
The date string must be written in UTC format, this format is interpreted as a local date/time. The condition date > CAST("2013-01-02T00:00:00Z", "NSDate") is True if the local time is after midnight local time on 02 Jan 2013.
Literal types in comparisons
-
Strings are delimited by either single or double-quotes: os_vers BEGINSWITH "10.7"
-
Integers have no quotes: os_vers_major == 10
-
Booleans are indicated as TRUE or FALSE (and have no quotes, or they’d be strings!): some_custom_condition == TRUE
-
Dates are possible, but they must be cast from ISO 8601 strings: date > CAST("2013-01-02T00:00:00Z", "NSDate")
Updates
Updates can be managed similarly to the other platforms in the AirWatch Console. If a new version of the file needs to be added, perform the following:
- Navigate to Apps & Books > Native
- Click on the App that requires an update. Clicking the app will navigate to the Details View page.
- In the top right side, click “Add Version”
- Upload the new installer for the new app version
- Upload the new pkginfo file for the new version
- Make any additional changes and then save the configuration
Troubleshooting
The AirWatch Console will show report macOS app installation data from a device in several locations:
- Apps & Books > Applications > Native > Internal. Click onto the Application to drill into Application Details > Devices Tab. The grid in this tab will display installation statuses for each device.
- Devices & Users > Devices > List View. Click on a device to drill into Device Details > Troubleshooting Tab. The grid on this tab will show activity on the device and provides filtering options to show information relating to Software Distribution.
Munki Logs can also be directly accessed on the device:
/Library/Application\ Support/AirWatch/Data/Munki/Managed\ Installs/Logs/ManagedSoftwareUpdate.log
tail -n 20 -F /Library/Application\ Support/AirWatch/Data/Munki/Managed\ Installs/Logs/ManagedSoftwareUpdate.log
Munki Known Issues
- Once software has been published and installed on a few devices, if any of the configuration options such as “install script”, “uninstall script” etc.. are changed, devices which already have the application installed successfully will not receive the updated options as these can only be updated when an “InstallApplication” command. This is the only command that can update the locally cached PKGInfo files on the device. In order to update the scripts, administrators will have to manually select all of the devices which have the software installed and repush the command. Repushing the command will update the respective cached PKGinfo file with the latest information.
Note: Repushing the command will NOT reinstall the application unless there is a change in the software version. Munki is has mechanisms in place to not reinstall software when the application is already installed.
- If a package has a dependency on another package or software then an administrator will have to manually provide a required key in the pkginfo of the package with a dependency. Providing the key in the pkginfo is the only way for Munki to recognize if there are any dependencies, and determine the sequence of installation steps for such dependent packages. Unless otherwise specified, packages are installed in random order. Such package installation will fail if a package dependency is not met during the installation.
Example: Netbeans requires that Java be present and installed on the machine. Netbeans will not implicitly install Java while installing the Netbeans software package. Even if administrators attempt to install Netbeans without utilizing M****unki or using standalone Munki, the installation will fail and will prompt the administrator to first install Java before installing Netbeans.
- For packages which have the same receipts array with same version even on an upgraded package, Munki will not be able to detect that a new package is an upgraded package. The reason is that the receipt array has the same version as the previous package. The impact of duplicated receipts arrays is that the packages will not be installed on User machines as Munki cannot determine that a new version needs to be installed.
Note: The best solution for packages with duplicate versions in the Receipts Array is to use an Autopkg Recipe, which adds an installs array in the pkginfo. This method allows Munki to detect upgraded packages; alternatively an administrator can manually add an installs array into the pkginfo.
Example: Wireshark is an example of a package which has identical receipts which contain the same version, thus Munki cannot detect the when upgraded packages are deployed.
Legacy methods (AirWatch 9.2 & older)
Apps & Books
- Go to Groups & Settings > All Settings > Devices and Users > Apple > MAC OS > Software Distribution.
- Enable Software distribution.
- Now go to Apps and Books > Native > Internal > Add Application.
- Upload the .pkg or .dmg file.
- Once uploaded, click on Continue. You will get an option to download VMware AirWatch Admin Assistance tool.
- Download the tool.
- Upload the .pkg or .dmg file there.
- You will see that it will open the package into .dmg file, .plist file and .png file.
- Go back to the Console and upload the .plist file for metadata.
- Click on upload and you will see the application description.
- You will get an option to upload the image. Upload .png file there.
- Now assign the application to the required Smart Group.
- Click on Save and Publish.
Product provisioning
It allows you to create, through AirWatch, products containing profiles, applications, and files/actions (depending on the platform you use). These products follow a set of rules, schedules, and dependencies as guidelines for ensuring your devices remain up to date with the content they need.
- Navigate to Devices > Staging & Provisioning > Components > Files/Actions
- Click on Add > General
- Navigate to Files > Add Files and enter the specific path
- Navigate to Manifest. Under Install Manifest, click Add Action. Choose the action type Install and provide the specific path.
- Under Uninstall Manifest, click Add Action and set the action type as Install, again providing the specific path.
- Under Uninstall Manifest, click on Add Action and choose the action type Uninstall, and provide the exact application name with the extension as ‘.app’.
- Select Save
- Navigate to Staging & Provisioning > Product List View and select Add Product.
- Under General, verify the details and assignment group are filled in.
- Navigate to the Manifest tab and click on Add. Choose the created component after selecting Install/Action.
With this configuration, the application will first be downloaded to the Downloads folder on the Mac. You can then install the application, which will be available in the Applications folder. If you want only to uninstall the application which was previously installed, you may choose the Delete Files option while creating files and actions.
Recipes
Script recipies
TextWrangler Post Install Script
Implement a post-install script that copies the command-line tools from the TextWrangler bundle to their intended locations.
After uploading the appropriate files to AirWatch, pre/post install scripts can be configured for the app in the Scripts tab of the Application Details. Simply paste the script into the appropriate field and AirWatch will format it to be used by Munki.

App recipes
Adobe Reader DC…
Adobe Reader DC
- Files:
- Upload the Acrobat DC Installer.pkg file and set to download to /tmp/Acrobat DC Installer.pkg
- Install Manifest:
- Action Type - Install: /tmp/Acrobat DC Installer.pkg
- Uninstall Manifest:
- Action Type - Run: rm -rf /Applications/Adobe\ Acrobat\ Reader\ DC.app/
- Action Type - Run: rm -rf /Library/Application\ Support/Adobe/Reader/
- Action Type - Run: rm -rf /Library/Application\ Support/Internet\ Plug-Ins/AdobePDFViewer.plugin/
- Action Type - Run: rm -rf /Library/Application\ Support/Internet\ Plug-Ins/AdobePDFViewerNPAPI.plugin/
Apple Enterprise Connect…
Apple Enterprise Connect
- Files:
- Upload the Enterprise Connect 1.6.3.pkg file and set to download to /tmp/Enterprise Connect 1.6.3.pkg
- Install Manifest:
- Action Type - Install: /tmp/Enterprise Connect 1.6.3.pkg
- Uninstall Manifest:
- Action Type - Uninstall: /Applications/Enterprise Connect.app
McAfee Endpoint Protection…
McAfee Endpoint Protection
- Files:
- Upload the install.sh and set it to download to /tmp/install.sh
- Install Manifest:
- Run Command: chmod +x /tmp/install.sh
- Run Command: sudo /tmp/install.sh -i > /dev/null 2>&1
- Uninstall Manifest:
- Action Type - Run: sudo /Library/McAfee/cma/scripts/uninstall.sh
Microsoft Skype For Business…
Microsoft Skype For Business
- Files:
- Upload the SkypeForBusinessInstaller-16.1.0.456.pkg file and set to download to /tmp/SkypeForBusinessInstaller-16.1.0.456.pkg
- Install Manifest:
- Action Type - Install: /tmp/SkypeForBusinessInstaller-16.1.0.456.pkg
Palo Alto GlobalProtect…
Palo Alto GlobalProtect
- Files:
- Upload the GlobalProtect-3.1.3.pkg and set it to download to /tmp/GlobalProtect-3.1.3.pkg
- Install Manifest:
- Install: /tmp/GlobalProtect-3.1.3.pkg
- Uninstall Manifest:
- Action Type - Run: sudo /bin/bash /Applications/GlobalProtect.app/Contents/Resources/uninstall_gp.sh
RSA SecureID…
RSA SecureID
- Files:
- Upload the RSASecurIDTokenAutoMac412x64.pkg and set it to download to /tmp/RSASecurIDTokenAutoMac412x64.pkg
- Install Manifest:
- Install: /tmp/RSASecurIDTokenAutoMac412x64.pkg
- Uninstall Manifest:
- Action Type - Run: sudo /usr/bin/python /Library/Application\ Support/SecurID/uninstall-rsasecurid.py &>/dev/null
Sophos Antivirus…
Sophos Antivirus
- Files:
- Upload the SophosInstall-Mac.zip and set it to download to /tmp/SophosInstall-Mac.zip
- Install Manifest:
- Install: /tmp/SophosInstall-Mac.zip
- Run Command: chmod a+x /tmp/TEMPDIR-SophosInstall-Mac\Sophos\ Installer.app/Contents/MacOS/Sophos\ Installer
- Run Command: chmod a+x /tmp/TEMPDIR-SophosInstall-Mac\Sophos\ Installer.app/Contents/MacOS/tools/com.sophos.bootstrap.helper
- Run Command: /tmp/TEMPDIR-SophosInstall-Mac\Sophos\ Installer.app/Contents/MacOS/Sophos\ Installer –install > /dev/null 2>&1
Symantec Removal Tool…
- Unpack the SymantecRemovalTool.zip.
- Upload the SymantecRemovalTool.command and set it to download to /tmp/SymantecRemovalTool.command
- Action Type - Run: chmod a+x /tmp/SymantecRemovalTool.command
- Action Type - Run: sudo /tmp/SymantecRemovalTool.command > /dev/null 2>&1
Manifest recipies
Quick fix for root user login bug (https://techcrunch.com/2017/11/28/astonishing-os-x-bug-lets-anyone-log-into-a-high-sierra-machine/ )
Enable root user with random password
Below are steps to fix the issue via Product Provisioning -
A. Create a File
- Go to Devices > Staging & Provisioning > Components > Files /Actions.
2. Add Files / Actions > macOS
- Manifest > Install Manifest > Run > Command Line and Arguments to run
/usr/bin/dscl . -passwd /Users/root $(/usr/bin/openssl rand -base64 20)
- Click Save
B. Create a Product to include above File
- Go to Devices > Staging & Provisioning > Products List View > Add Product > macOS
2. Click on Manifest > Add Manifest > Actions to Perform > Install Files / Actions > Files/Actions (Enter the saved file).
- Save & Activate the product
Unsigned application launch bypassing Security & Privacy
Use above recipe with command Manifest > Install Manifest > Run > Command Line and Arguments to run:
sudo xattr -rd com.apple.quarantine /Applications/@cursor # where '/Applications/@cursor' is the target app