Upgrade Rollback
The rollback process contains two phases. First, a backup of the database (that was taken prior to the upgrade) is restored and configured. Next, either backups of any application servers (Console, Device Services, etc) are applied, or the previous version of the AirWatch application is simply reinstalled on those servers after uninstalling the current version.
Restoring a database backup
The following steps can be used to restore a database backup to an existing database server and apply the necessary configuration changes. This process assumes that a backup has been created prior to any upgrades, when the environment was fully functional.
- Before working with the database, make sure that, for any AirWatch application servers (Console, Device Services, etc), all AirWatch services are stopped. Additionally, stop the World Wide Publishing Service. Finally, make sure that IIS is stopped as well.
- Open Microsoft SQL Server Management Studio, right-click on Databases and select Restore Database.
- Under the General tab on the left and within the Source for restore section, select From device, then select ‘…’ button.
- From the Specify Backup page, select Add. Locate the backup, select it, and click OK. The database backup will display on the Specify Backup page. Click OK.
- Select the Restore check box.
- Under Destination for restore, select the To database drop-down list and select the AirWatch database name. Note: This should be the last database in the list, in the event you have multiple backups all named AirWatch and are unsure of which one to select. Click OK to start the database restoration.
On the old database: Next you need to note the user permissions of the old database’s AirWatch SQL Service Account. To do this:
- Open Microsoft SQL Server Management Studio
- Navigate to Security > Logins >
to locate your DB User in the Object Explorer, and then right-click and choose Properties. - Navigate to the Server Roles tab. Write down the roles listed
- Select User Mapping. Write down the user mappings listed and the role membership permissions
Warning
Take note of all of the role memberships for AirWatch, master, model, msdb, and tempdb.
On the new database:
- Delete the AirWatch SQL Service Account, which was created when you restored.
- Create the new AirWatch SQL Service Account. To do this navigate to Security > Logins, right-click, and select New Login.
Warning
This procedure is only for the main AirWatch SQL Service Account If you had any other custom-created SQL accounts you will need to perform this procedure for each of them.
- Enter the following:
A. Select whether to use Windows or SQL Server authentication. For SQL Server authentication, enter your user credentials. Note: The username needs to exactly match the username of the old database.
B. Uncheck Enforce password policy.
C. Select the AirWatch database as the Default database.
D. For Server Role, enter the roles you noted previously.
E. For User Mapping, enter the user mappings and permissions you noted previously. IMPORTANT: This should include all of the permissions that you copied for AirWatch, master, model, msdb, and tempdb.
Next you need to migrate any AirWatch-related jobs.
The steps below are for the purge job, but any other AirWatch-related jobs need to be similarly migrated using the procedure below
Warning
On the old database:
- Navigate to SQL Server Agent > Jobs, right-click <AirWatch_DB> - Purge Expired Sample Data, and select Script Job as > CREATE To > New Query Editor Window.
- Save as the query.
- Transfer the query to your new database.
- On your new database: Execute the query.
Warning
To reiterate, any other AirWatch-related jobs need to be similarly migrated using the procedure above
On the new database: Perform a test query. For example, one for device count, to ensure proper functioning. To do this:
- Right-click on the AirWatch database under Databases and select New Query.
- Enter the query as shown below.
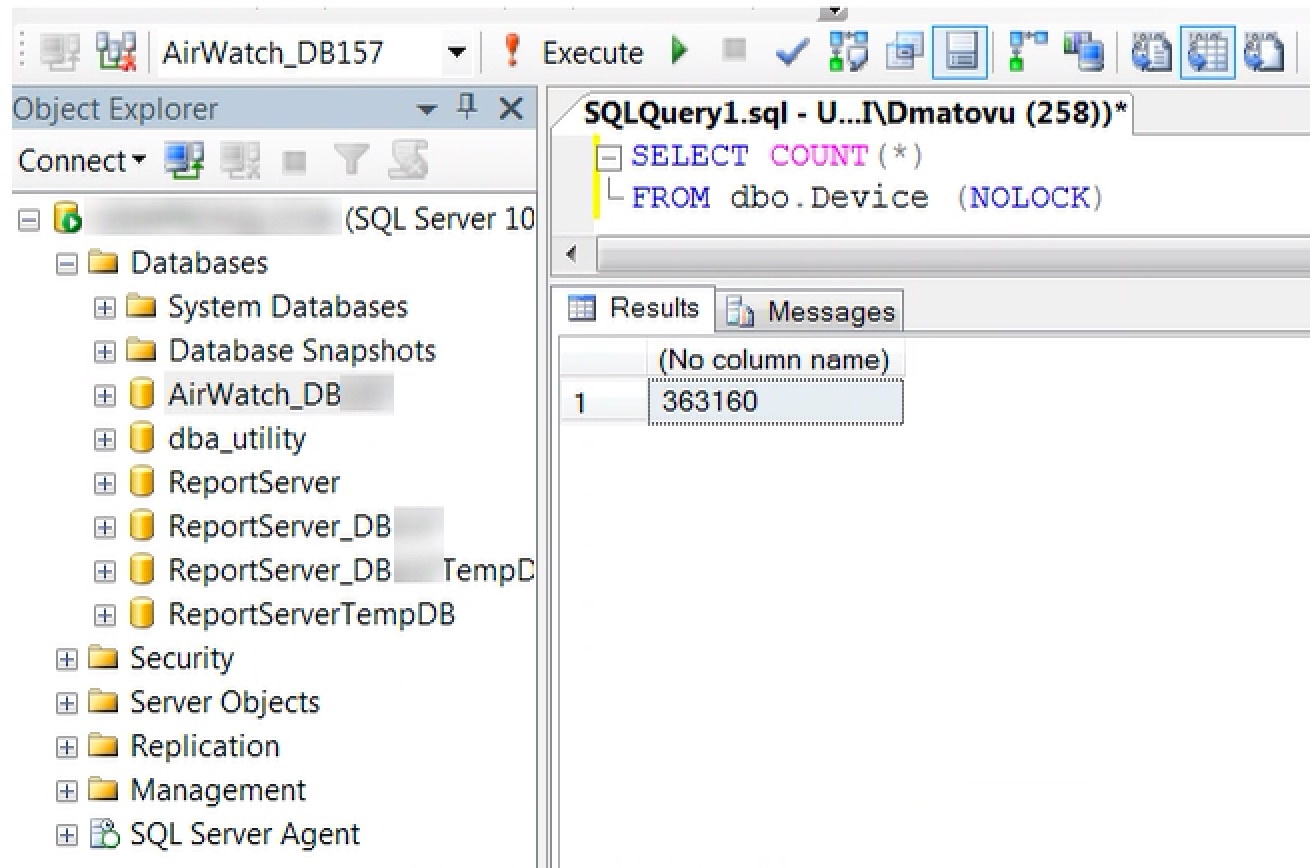
- Select Execute.
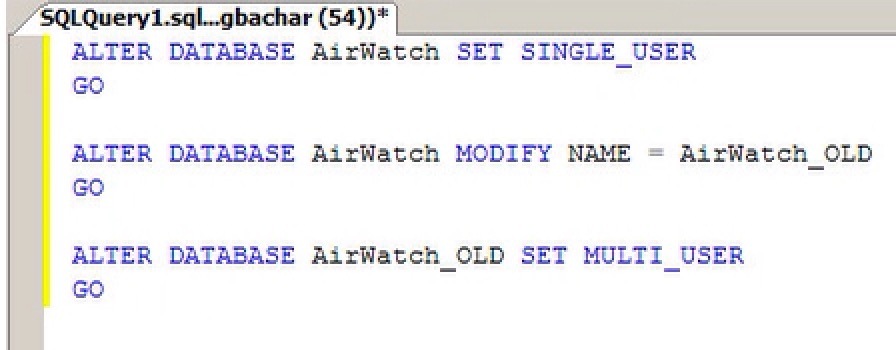
Rename the old database, for example, to AirWatch_OLD. To kill all connections and rename the database, run the following script, replacing ‘AirWatch’ with the name of your old AirWatch DB and AirWatch_OLD with what you would like to rename the old database to.
Restoring a previous version of the application
With the database backup restored, the next step is to restore the proper version of the application. Ideally, there will be a snapshot or backup of each application server from the same time as the database backup. In this case, simply restore these backups in order to restore functionality.
However, if there are no available snapshots or backups of the servers, then the previous version of the AirWatch software must be reinstalled.
In these cases, identify which application servers have an updated version of the application (this will likely be all application servers, but may only be a subset of them). For each of these, ensure that a copy of the AirWatch installer for the correct version has been installed on the server. Uninstall the current version of the software through Computer > Uninstall or change a program by selecting the AirWatch application. With this uninstalled, open previous version of the AirWatch installer and proceed as normal. When configuring the database connection, ensure the configurations used match those of the restored database.
Finally, when both the database and application has been restored properly, ensure that IIS and all AirWatch services (as well as the World Wide Web Publishing service) are properly started.
Changing the database connection string
In some cases, it may be necessary to change the database connection string of an application server without fully reinstalling the software. For example, if a database migration has occurred, the name of the database may have simply changed. Perform the following steps to update the database connection string on each AirWatch application server. Note that this must be done on every application server so that they are pointing to the new database.
Note
- For deployments with dedicated API and AWCM servers: Dedicated API and AWCM servers are considered application servers, similar to the AirWatch Console and Device Services. You should therefore perform the steps below regarding re-pointing app servers on these servers if you have dedicated servers for these components.
- EIS, SEG, ACC/ESC are considered auxiliary components and you do not need to perform this step for these components.
Steps:
- Navigate to AirWatch Root Folder on the application server.
- Navigate to AirWatch X.X\Supplemental Software\Tools\UpdateSQLServerInfo.
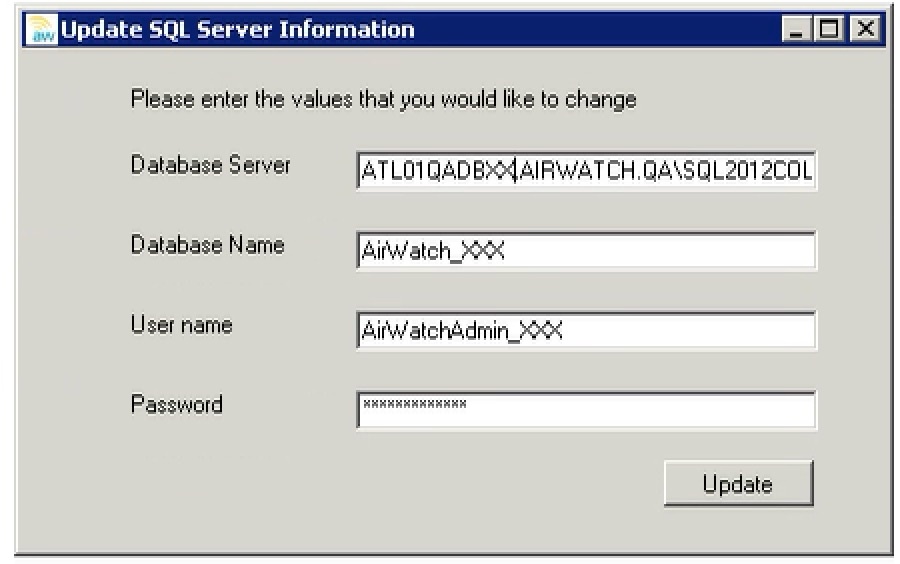
- Launch UpdateSQLServerInfo.exe.
- Update the Server Hostname, Database Name, Username and Password. If Windows authentication is being used, the password field may be blank.
- Make sure to restart IIS and all AirWatch services on each server after updating the SQL connection string.